Go to Step 4: Adding the AI Chatbot Customer Service Skill to your Watson Assistant Instance (Pro plugin users only)


Step 3:
In order capture chat logs you must setup a pre and post-message Watson Assistant webhook. This process is outlined in great detail here, however we have provided abbreviated instructions below.
Complete the following steps to setup a webhook for your Watson Assistant Instance:
- Go to the IBM Cloud Resource list.
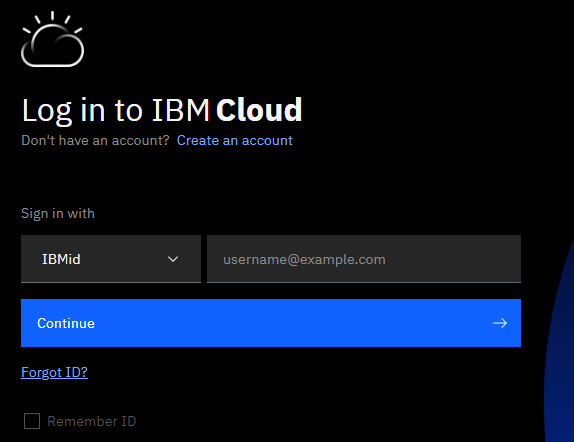
- Sign into you IBM Cloud Account. (figure 1)
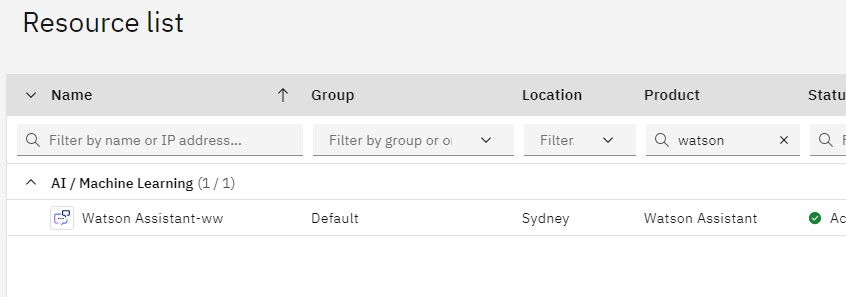
- Type “Watson” in the product column. (figure 2)
- Click on the “AI / Machine Learning” dropdown.
- Click on “Watson Assistant-mi” or the name of your Watson Assistant instance.
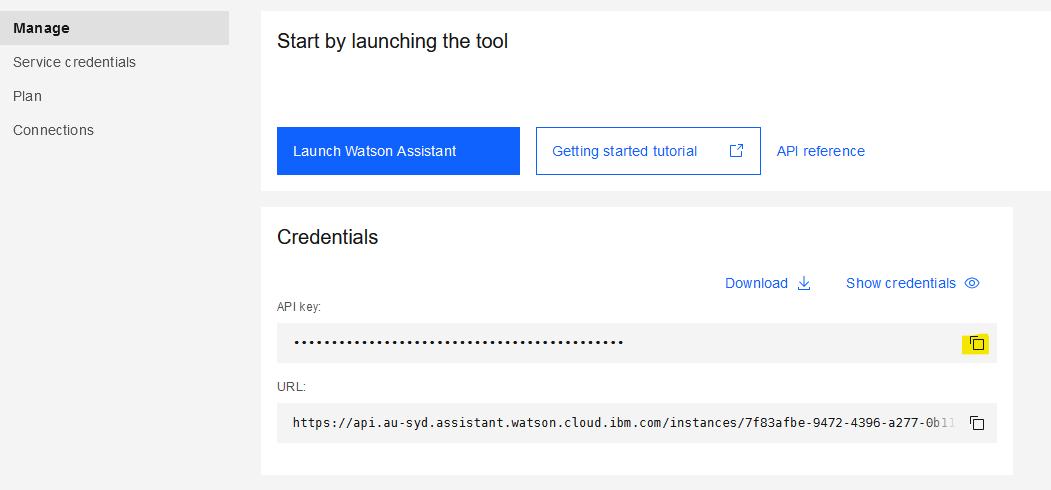
- Click on the “Launch Watson Assistant” button. (figure 3)
- Locate your Watson Assistant instance and click on the 3 dots to the right of the box and choose, “Settings”. (figure 4)
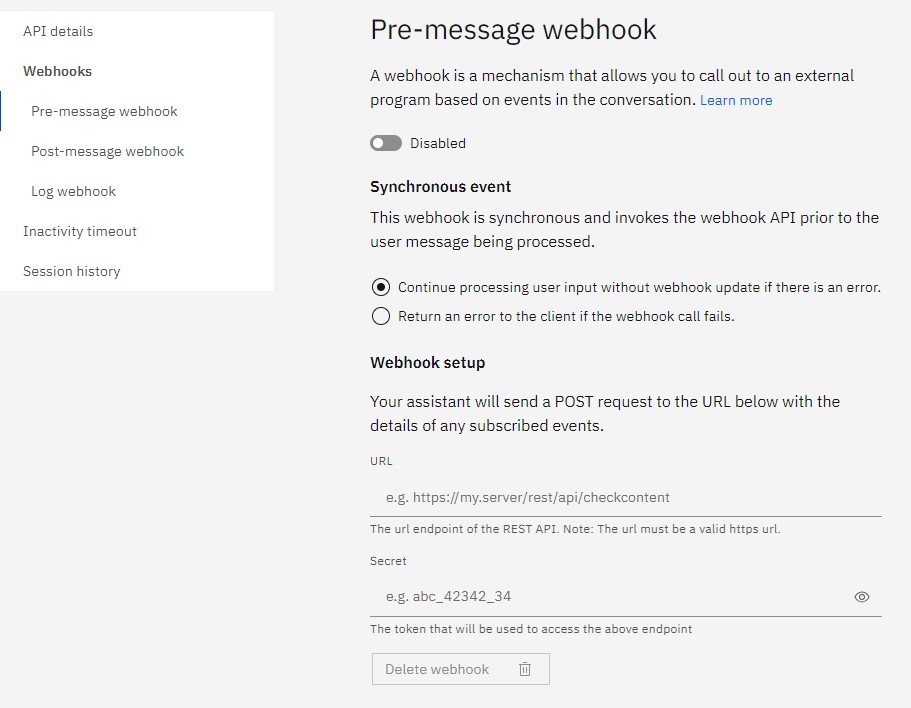
- Click on the “Webhooks” tab. (figure 5)
- Click on “Pre-message webhook”. (figure 5)
- Copy the webhook url provided on the AI Chatbot > Settings page. (figure 6)
- Paste it into the URL field. (figure 5)
- Enter any value you like in the secret field, this is required by Watson but not used for implementation of the plugin. (figure 5)
- Choose “Continue processing user input without webhook update if there is an error”. (figure 5)
- Click “Enabled”. (figure 5)
- Click on “Post-message webhook”. (figure 5)
- Repeat steps 10-14 above. (figure 5)
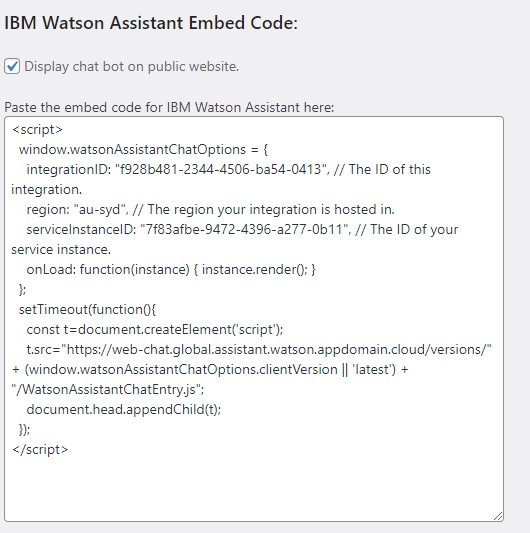
- Go to AI Chatbot > Settings on your WordPress Dashboard and ensure that the “Display chat bot on public website” option is enabled. (figure 7)
-
Go to your website and send some messages using the Chatbot to verify that logs are being maintained.
Figure 1: IBM Website
Figure 2: Resource List
Figure 3: Launch Watson Assistant
Figure 4: Accessing Watson Assistant Settings
Figure 5: Entering Watson Assistant Webhook Settings
Figure 6: Watson Assistant Webhook URL
Figure 7: Enable Display Option